Monday, August 23, 2010
Culinary Gardening Series Episode 3
Back in May, I uploaded Episode 1 and 2 of the Culinary Gardening Series produced in conjunction with Boulder Valley Media Alliance (Channel 22) and Eric Skokan, the owner of Black Cat Farm and Black Cat Farm Table Bistro.
Episode 3, as you will see, takes place in Eric's bistro kitchen where he talks us through preparing a bistro meal with produce from his farm.
Monday, July 5, 2010
Thursday, July 1, 2010
Roses with Breakfast

This morning, on my way to breakfast with friends, I popped into my local Whole Foods Market where I noticed the most glorious bunches of roses.
The rose colors were so vibrant and splendid; I stopped, pulled my
Once at my friends, we set the table with our shared bounty, whereupon I was delighted by the likeness of the candy-colored roses I'd brought to the colors in our breakfast spread.

There really is nothing more appetizing than fresh, colorful food. Perhaps that's the case because color radiates energy and life, even joy, and certainly beauty.
Food that looks beautiful isn't always delicious, but its beauty inspires our desire to taste nevertheless.
Many years ago, I became quite intoxicated by the rich hue of Chinese-red roses. I bought a bunch, not for the purpose of beautifying my home, but to eat.
I plucked the petals from the buds and tossed them into a large jam pot with water, sugar, and rose water. Well on the way to making rose-petal jelly, my hope was that I'd create a floral jelly rich in color, scent and flavor.
Alas, my jelly was a flop, but don't let my failure deter you. I'm linking here to a recipe that is very straightforward and simple. Try it for yourself and see if you can create a batch of rose petal jelly that rivals the beauty of the rose on the stem -- and do let me know how you get on!
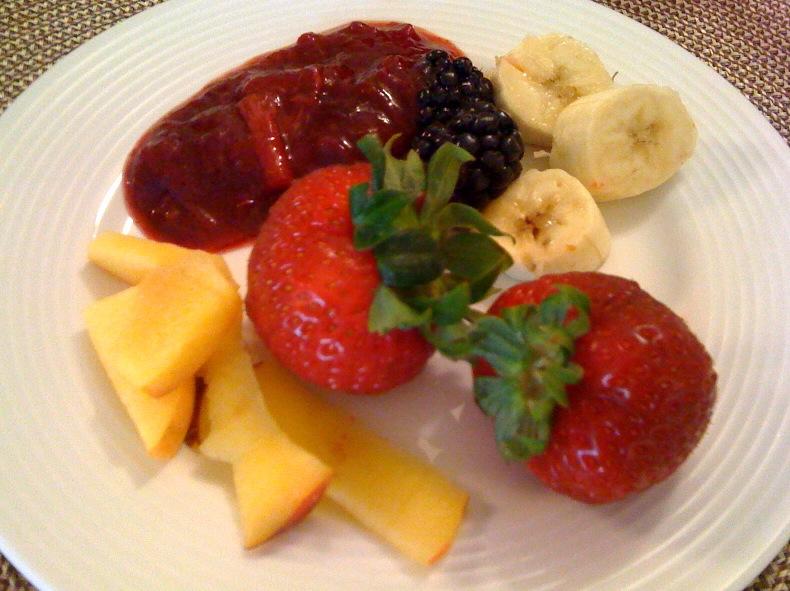
Rose petals not only make heavenly jelly, but you can also eat the petals. Last summer I plucked velvety, ruby-red petals from buds and used them as garnish on a dessert plate of wild strawberries, Colorado peaches, yogurt and honey.
Steep lavender and rose petals in hot water with black tea for a delectable cuppa; you can also add rose petals to green salads for interest, color, and as a talking point!
And did you know that rose petals ground with a little water into a gelatinous paste, then molded into tiny balls, and then dried, are the original rosary beads?
Ah, the versatile rose, so beautiful, you just want to eat them -- and indeed you can, though today, I just gazed at them over breakfast.
Tuesday, June 29, 2010
Herb & Pesto Polenta with Salmon & Eggs

A couple of weeks ago I mentioned a friend had come to visit and brought with her treats from the northwest where she lives.
One of those treats was a bottle of marionberry spread, which I wrote about in my post titled Marionberry Rhubarb with CashewNut Cream.
Another of the treats was an 8-ounce pack of locally caught, wild king salmon (also known as Chinook salmon) which she'd bought direct from the fisherman who'd smoked it with maple and wine.
That's one of the advantages of living in the Pacific Northwest: access to just-caught, wild fresh fish, and in particular, Chinook salmon.
In the July issue of O Magazine, which I mentioned last week because of the 10-page spread on extreme dietary choices, there is a "tip box" on the page featuring a woman who is a pescavore (eats only seafood).
The first tip in the box is "Download a Monterey Bay Aquarium Seafood Watch pocket guide for best picks, fish to avoid and good alternatives."
I've linked to that guide, and others like it, many times on this blog. And the reason I've done so is to alert readers to easily-accessible, online resources that can help them make healthy and sustainable seafood choices when grocery shopping.
Because I'm posting a meal idea making use of the wild caught Chinook salmon my friend Judi gave me, I went onto Seafood Watch's website to see what they had to say about salmon, and I saw the heading Updated West Coast Salmon Recommendations.
Seafood Watch is recommending consumers avoid wild caught salmon from California and Oregon due to the declining populations of Chinook salmon in these states.
Whereas wild caught salmon from Alaska remains the best choice and good alternatives are wild caught salmon from Washington (which is what Judi gave me) and northern Oregon.
Last summer, I took a friend's husband grocery shopping. Bruce is an introvert and he wanted some tips on navigating Whole Foods Market on a budget and without going into overwhelm. It was Bruce who introduced me to Seafood Watch's pocket guide.
I was very impressed that he made specific seafood choices for his family based on the guide and I decided if he can do it, I can too, and so can you. Read the guide online, print it out, and keep it on hand when next grocery shopping.
Herb Polenta with Pesto, Salmon & Eggs
1) To make the polenta base (which is underneath the pesto and salmon in the top pic), pour 1 cup of polenta into a pot with 2 cups water and 2 cups half and half. Gently stir off-and-on for about 30 mins over a low heat.
2) At the last minute, toss your choice of grated cheese and stir until the cheese melts. Taste test, adding salt and pepper if you wish.
3) If you have herbs growing in your garden or window box, pick a handful. I chose parsley, marjoram, and chives, chopped them coarsely, and then tossed them into the cooked polenta.
4) Now pour the polenta into an oil-lined pan or baking tray and let it set.
5) Once it has set and is cool, turn polenta onto a plate and spread it with pesto. I had some garlic scape pesto left over so I used that.
To Serve: Break into pieces about 3 ounces or more, depending on the number of people eating, of smoked salmon and spread the bits atop the herb and pesto polenta. I dotted some sliced black olives over the lot, and then garnished the plate with a couple of sliced, hard-boiled eggs.
One cup of cooked polenta made the portion in the top pic, which I cut in two, sharing it with a friend with a side salad of garden-fresh greens.
Monday, June 28, 2010
Meatless Monday

This morning when I was in the garden, I noticed the pumpkin blossoms blooming (below).
 It was just this past weekend that I commented on a series of pictures of harvested squash and their blossoms posted by my Facebook friend, British actress and author, Carol Drinkwater.
Carol and her husband have an olive farm above Nice, in the dry Mediterranean climate of the south of France. There they grow olives--which produce award-winning olive oil--farm bees, and harvest produce from their vegetable garden.
 The growing season is obviously longer in the south of France since the pictures Carol posted of the squash from her garden reveal large, ready-to-eat squash, versus the just-budding pumpkin growing in the Colorado garden I'm care-taking.
Pumpkins, which are actually a gourd-like squash, produce the same edible yellow flowers as the zucchini, a summer squash.
Last August, when house sitting another property, an urban farm with a huge vegetable garden, I wrote about preparing squash blossoms for a series of garden-to-table vegetarian side dishes.
Seeing Carol's pictures this weekend on Facebook, and then noting the pumpkin blossoms in the garden this morning, I thought I'd reprint a variation on my recipe for stuffed squash blossoms for this week's Meatless Monday all-vegetarian meal idea.
 Lining the platter of cooked blossoms (pic at top) are nasturtium leaves and their flowers.
To the left are nasturtiums growing in the garden.
Both the nasturtium leaves and the flowers are edible and they're easy to grow, even in a window box! (Or find them at your local farmer's market.)
The leaves have a delicate peppery flavor, and the flowers look amazing tossed into a simple green salad because of their bright orange, yellowy-red color (pic at very top).
(The pink flowers in the pic just above are not nasturtium flowers.)
Stuffed Squash Blossoms with Nasturtium Leaf Salad
1) If you have access to a vegetable garden, that's probably the most likely place you'll find squash blossoms (or your local farmer's market). Pick blossoms which are open and healthy looking.
2) In the kitchen, gently cut the stamen out from inside the blossom.
3) Wash blossom of dirt and little bugs. (You can of course leave the bugs in the blossom; they'll add to the mineral and protein content of this vegetarian dish!) Set blossoms aside.
4) Into a bowl crumble about a cup or so of cornbread. If you made my DuckEgg cornbread, use stale leftovers. Or you could use stale bread crumbs or leftover cooked rice.
5) To the bowl, add your choice of grated vegetable, such as carrot or zucchini, perhaps some green onion, and some fresh herbs i.e. basil and oregano, or sage and thyme, or parsley and cilantro -- a mix of your favorite herbs.
6) Add one large or two small eggs to the mix, stirring gently so the stuffing binds. If mixture is sloppy, add more grain or crumbs.
Note: As you can see in the pic at top, my stuffing was too wet and so it oozed out of the blossoms. To avoid this, make sure your stuffing is firm, one large, rather than two small eggs, may be plenty.
7) You might also like to add your choice of grated cheese, i.e. Parmesan.
8) Take a small teaspoon of stuffing and place it into the center of each blossom. As you stuff each blossom, curl the end so that the blossom is sealed; now place it on a baking tray and moisten with a little olive oil.
9) Place baking tray of stuffed blossoms into heated 350-degree oven for about 10-15 mins. Keep and eye on the blossoms, you don't want them to overcook, but you do want the stuffing to set.
To Serve: Decorate a serving platter with nasturtium leaves and nasturtium flowers. Using an egg spatula, gently arrange the hot, stuffed blossoms in the center of the platter.
To a bowl of Garlic Dressed Salad Greens add a couple handfuls of nasturtium leaves and a handful of the edible flowers, toss, and serve salad alongside your platter of stuffed squash blossoms.
Thursday, June 24, 2010
What Are You Eating?

The July issue of O Magazine features a 10-page spread titled "What Are You Eating."
Within those 10 pages are the preferred diets of 10 individuals.
Ranging from a fruitarian to an all-day grazer of junk food, from a carnivore who prefers to hunt and kill his own meat to an omnivore with an appetite for just about anything, the diets are extreme.
The article is worth reading for the shock factor. Apparently some people eat what they eat quite happily and for valid personal reasons -- like the guy who lives on bread, steak and cereal because nothing else tastes good to him!
Whether the 10 (and others like them) are healthy eating what they're eating is highly questionable, but that's another article.
When I finished reading "What Are You Eating," I realized Market to Mouth probably looks and reads as though I'm one of those people who are, quote, "making it hard to feel good about eating anymore ... that subset of -arian, -vores, and -ists who eat not just thoughtfully but righteously."
I confess to being very thoughtful about the food I buy, cook and eat (or this past month, the food I pick from the garden to cook and eat). Though hopefully, I'm not righteous about it; I certainly wouldn't want to make readers feel guilty about what they're eating or not eating.
Being a thoughtful and conscious consumer of locally grown and produced whole, unprocessed food reaps dividends; the most obvious is the benefit to one's health, and then the benefit to the economic and sustainable health of one's community.
For these reasons, I feel very good about consuming and eating thoughtfully and with a conscience.
With that in mind, today's thoughtful meal idea comes, once again, from the garden to the table.
However, it's not exactly a meal, but rather a delicious side of unusual edibles: snap-pea greens and garlic scapes, both of which I've included in a number of posts in recent weeks.
 In fact, it was this past Meatless Monday that I posted a recipe for pasta with Garlic Scape Pesto garnished with pea greens (pic to left).
I still have some of the pesto in the fridge and I've been using it to dress salads, and as a paste on crackers with cheese and olives.
Garlic scapes (pic below) have a strong garlic - onion flavor when raw, but gently sauteed or roasted in the oven tossed in a little oil, they're not as pungent.
 The leaves, shoots and flowers of the snap peas are sweet and tender and taste just like raw snap peas.
Find scapes and snap-pea greens at your local farmer's market and then toss washed and coarsely chopped scapes into a skillet with butter and saute until just soft.
Toss washed snap pea greens over the scapes, gently stir for a minute or until the leaves wilt slightly. Season to taste.
To Serve: Spoon wilted greens into a serving bowl. Add a dollop of sour cream. Eat as a side with pasta or baked potato and or as accompaniment to fish or poultry.
Wednesday, June 23, 2010
Marionberry Rhubarb with CashewNut Cream

Last Friday I mentioned a friend had arrived for a visit. And with her, she brought a bag of goodies including a jar of Oregon marionberry spread.
As it turned out, I didn't open the spread while she was here. Instead, this morning I plucked some stems of green rhubarb from the garden, stewed them, adding the marionberry spread to create a beautiful, ruby-red compote for breakfast.
The green variety of rhubarb stays green upon cooking, in fact, a rather unappetizing green so the addition of the dark burgundy berry spread added desirable color.
While at Whole Foods a few days ago, I noticed locally grown, organic red rhubarb in the produce section. At $6.99 lb it was priced high -- a luxury item for most.
I haven't compared that price to our local farmer's market, but if you're looking for rhubarb, that might be a more budget-friendly option.
The marionberry spread had no added sugar and like the rhubarb it's tart (though the green variety of rhubarb is actually a bit sweeter than the red varietal).
Rather than add sugar to my compote, I tossed in chunks of apple for sweetness and topped the lot with cashew nut cream and swirls of honey.
Marionberry Rhubarb with CashewNut Cream
1) Wash and peel 4 stalks of rhubarb. When I peel the stalks, I just remove the most fibrous sinews. If you remove all the outer fiber from the stalks, there's not much left, so go easy with the peeling.
2) Chop rhubarb into chunks, toss into a pot, and add just enough water to cover the rhubarb.
3) Simmer over low heat for about 10 mins.
4) Add either a cup of your favorite fresh or frozen summer berries, i.e. blueberries, raspberries, strawberries or a heaped tablespoon of a dark fruit, sugarless spread. Stir the fruit or spread through the rhubarb until it's well blended.
5) Remove pot from the stove and add chopped chunks of apple.
CashewNut Cream
1) Toss a large handful of raw cashew nuts into a blender. Add hot filtered water, just enough to cover the nuts.
2) Blend the nuts and water until creamy. Add more water if you'd prefer a smoother cream.
3) Taste test. If you like the flavor as is, great, and if you'd prefer an enhanced flavor consider adding a dash of vanilla or some cinnamon or a slug of maple syrup.
Note: Simply by adding water and blending, cashew nuts turn incredibly creamy. Other nuts don't blend to the same smooth consistency, but don't let that stop you swapping out cashew nuts for say, pecans or almonds.
To Serve: Ladle a portion of the fruit compote into a bowl. Top with a heaped spoonful of the cashew nut cream and swirls of honey or maple syrup.
If you're eating this for breakfast, as I did, and you'd prefer a heartier start to your day, spoon the fruit compote, nut cream and honey over a bowl of hot oatmeal and finish it with some whole, raw cashews.
Monday, June 21, 2010
Meatless Monday

One thing that happens when you have access to a garden filled with a selection of spring greens, herbs, and onions is innovation in the kitchen.
Though the garden I'm tending while house sitting doesn't have basil growing, it does have parsley, spinach (and lots of other leafy greens) plus a selection of onions, including garlic.
The garlic, busily forming underground into the bulb we recognize, is also sprouting long green shoots above ground. These green shoots grow into curly tendrils that look quite exotic (see slide show below).
And what I discovered via a Facebook friend is that those exotic-looking tendrils are called garlic scapes and they're delicious cooked or eaten raw in say, a pesto.
The scape's flavor is a cross between garlic and the purple spring onions I posted about last Friday.
Because I find raw garlic highly pungent, when I blended the scapes into the pesto sauce I made yesterday, I added equal portions of both spinach and parsley.
Whenever I make traditional pesto with basil, garlic, Parmesan and nuts, I toss in a handful of parsley. The chlorophyll in the parsley helps counteract the heat of the garlic and it balances out the highly aromatic basil.
And having made a batch of garlic scape pesto, naturally it lent itself to a Meatless Monday pasta dish!
If you want to try your hand at today's meatless meal, and you don't have garlic scapes in your veggie garden, look for them at your local farmer's market.
Follow the slide show and method recipe below to make:
Pasta with Garlic Scape Pesto
1) Wash about 4-6 scapes, and a small handful each of spinach and parsley. Drain.
2) Put scapes and greens into a blender with about 3/4 of a cup of olive oil.
3) Pulse until the oil and greens and blended, then add several tablespoons of grated Parmesan and pulse again.
4) Taste test. Add salt and pepper if you wish, and a splash of lemon or lime juice.
Optional: Rather than salt the pesto, you could add a squirt of anchovy paste or even several anchovy fillets and a bit of the oil from the tin.
5) Boil your choice of pasta. Drain, and then run colander under the hot water tap and flush out starchy water. Return pasta pot the stove, stir for a minute over low heat to dry pasta.
6) Away from the hot plate, stir pesto through pasta.
To Serve: Pour pesto pasta into a large serving bowl. Decorate the top with black olives. I garnished the edge of the bowl with snap-pea greens and the white, edible flowers attached to the greens.
With the pasta, I served a large garden salad, the one I posted last week, though I omitted the garlic from the dressing since the garlic scapes in the pesto was sufficient garlic for one meal.
Friday, June 18, 2010
Tumeric Chicken with Purple Spring Onion

One of the joys of having friends to stay, especially friends who enjoy pottering about in the kitchen, is the likelihood of eating a meal they've prepared.
And that's just what happened last night, when a friend of mine flew in from out of town for a visit.
Judi, who lives in the northwest, arrived with a bag of locally-grown goodies: Seattle's very own organic and fair trade Theo Chocolate, wild king salmon, that she'd bought direct from the fisherman who'd smoked it with wine and maple, and Misty Meadows Marionberry Spread.
I've never had marionberries. According to Misty Meadow's website, marrionberries are from the Willematte Valley in Oregon, and they're of the "cane berry family" and have a "clear fruity flavor."
Apparently, marrionberry pie is an Oregon favorite, as is warming the jam and pouring it over ice cream. I'm excited to smother the jam over a chunk of my DuckEgg Cornbread, which I plan to make for our breakfast this weekend.
I thought we might have the wild king salmon for dinner. Wrapped in it's cryovac pack, the exquisite color of the salmon, it's obvious succulence, and the wine and maple smoking veritably screamed out to me: eat me now!
However, Judi insisted that I keep it for later; she'd picked up some "natural" chicken (there's that nebulous labeling again) and had an idea for cooking it up with vegetables from the garden.
Of course any ideas she had for cooking dinner were fine with me, since I was thrilled at the prospect of eating a meal prepared by someone other than myself!
 I let her fossick in the veggie garden and after a while she came in with purple spring onions, which once washed, peeled and trimmed are really quite beautiful (pic to left).
She'd also collected kale and turnips (both of which are abundant right now and thus they've been appearing in all my blog meals of late), and cilantro and parsley.
I was interested to see what Judi would create with ingredients I've been cooking with these last couple of weeks.
Here is what I observed, and then ate with gusto:
Turmeric Chicken with Purple Spring Onion
1) Wash, peel, trim and cut into pieces one large purple spring onion. (You'll be able to find these at your local farmer's market.)
2) Toss spring onion in a skillet with some oil; saute gently on low until transparent.
3) Add about a teaspoon of turmeric; stir into onion.
4) Over the turmeric onions lay several boned chicken thighs; stir about so that the meat is well coated with turmeric.
5) Having washed and coarsely chopped a handful each of parsley and cilantro sprinkle over the chicken (pic at top).
6) Squeeze the juice of half a lemon over the lot, place the lid on the skillet and with the heat still on low; allow the chicken to gently cook in its own juices for about 15 or so mins.
 To Serve: We had our turmeric chicken over a bed of sauteed turnips, turnip greens, kale and carrots (pic to left and below).
Judi did what I've doing with the garden greens and simply washed, drained and chopped the vegetables, tossing them into a second skillet with peeled and chopped fresh ginger and olive oil.
She then allowed the veggies to wilt over a med-to-low heat, adding a dash of rice wine vinegar at the last minute to bring out the natural flavor of the vegetables.
 Because the color of the turmeric chicken was a rich yellow, sitting atop an ample portion of the wilted greens, turnip and carrot, the variegation of colors in the meal was quite spectacular.
To finish, Judi sprinkled some chopped, raw almonds over the chicken and this added crunch and texture.
You might prefer to serve your turmeric chicken with the Garlic-Dressed Salad Greens I posted recently; this would be a lighter though equally satisfying meal.
FYI: I posted a note on Facebook regarding my lack of success sourcing organic and free-range chicken meat in Boulder County. In response, Edible Front Range directed me to their online resource page.
I checked it out, and indeed, they've put together an extensive list of all that's locally grown, including poultry that's organic, truly free-range and humanely farmed.
Edible is published regionally, so check out your local publication for links and connections to the best locally grown produce, meat, dairy, poultry and eggs.
Thursday, June 17, 2010
Salmon with Steamed Cucumber & Turnips

I have this nifty way of cooking fish on top of the stove so that there is minimal fuss and mess and no fishy smell.
As you may be aware, reading my posts, I do a lot of stove-top cooking, sauteing and steaming meals in an iron skillet.
I prefer my cast iron skillet over other fry pans because it's solid and versatile.
And since iron skillets are absent plastic handles and heat-sensitive non-stick surfaces, they can go from the top of the stove into the oven with ease.
A couple of weeks ago, I posted a recipe for DuckEgg Cornbread, which I baked in the oven in a skillet lined with foil.
 The salmon in today's meal idea is also cooked in foil in a skillet (with lid on), but on top of the stove rather than in the oven.
The fish gently steam cooks in its marinade (pic to left), and because it's enclosed in foil, I can toss vegetables around the skillet and they'll cook separately but at the same time (pic below).
The beauty of this method is that I can prepare a complete meal (for two) in one pan, without the fish flavor and smells permeating the vegetables, the pan and the kitchen!
 I chose to make this dish with wild-caught Sockeye salmon, which I'd bought frozen -- two fillets to a pack.
The frozen variety is economical, yet the flavor is not always great, so I usually marinade previously frozen fish.
For the vegetables, I picked turnips and their leafy-green tops from the garden, some organic carrots at the bottom of the fridge, and an organic cucumber I'd picked up on sale at the market.
Salmon with Steamed Cucumber & Turnips
1) Place your choice of fish on top of a piece of foil (enough to wrap around the fish).
2) Over the fish drizzle some olive oil, Braggs Liquid Aminos or Tamari or Soy Sauce.
3) Add to that a chunk of peeled and chopped ginger root, and the same of garlic or green onions or shallots. And you might like to also add a splash of orange or lemon juice.
4) Allow the fish to sit in the marinade in the foil for at least 30 mins.
5) Meanwhile, wash and chop a selection of vegetables. As I mention above, I used baby turnips, and their green tops, carrot, and cucumber.
Note: We think of cucumber as a salad vegetable, but it's wonderful cooked; it turns transparent, soft and juicy, while still maintaining its distinct cucumber flavor.
6) Now turn the fish over in the foil a few times, coating it with the marinade. Fold the foil over the fish, creating a sealed packet (see pic above), and then place the foil pack in the center of the skillet.
7) Scatter the chopped veggies around the fish, and if you have any more ginger bits, scatter those over the vegetables; drizzle a couple tablespoons water and oil over the veggies too.
7) Put a lid on the skillet and turn the stove-top heat to low and allow the fish and veggies to gently steam for about 10-15 mins.
To Serve: Onto a plate or large bowl, spoon a portion of vegetables. Unwrap the foil, gently lift the fish out with an egg lifter and place it over the veggies. Pour the juice, ginger and garlic bits from the foil over the fish. Garnish with chives or green onions or parsley or dill.
Wednesday, June 16, 2010
Garlic Dressed Salad Greens
 While I have access to a bounty of garden-fresh salad greens, daily, I'm creating different and interesting ways to eat them.
I used to think the loose salad mix at the market was tasty and good value; at around $6.99 pound, I could buy a big bag and make it last a few days.
Once spring arrives, the locally-grown farmer's market loose salad mix offers greater variety, and thus flavor, for similar dollar value.
If the garden on the property I'm care-taking wasn't bursting with spring greens, I'd definitely shop my local farmer's market for salad greens.
Or I'd consider growing my own!
For some, a green salad's yum factor is dependent on the selection and flavor of the leaves. For others, it's the dressing.
I like a combination of both interesting greens and tasty dressing. And while I understand the convenience of the myriad of bottled dressings available at the market, there is nothing more delicious than unadulterated home-made vinaigrette.
I say unadulterated because if you read the labels on store-bought dressings, such as a simple vinaigrette, you'll note that the list of ingredients includes a whole lot more than oil and vinegar!
It's really very easy to make your own vinaigrette, and rather than use kitchen equipment to do so, consider making it directly in the salad bowl.
My mother had a wooden salad bowl which she used especially for making her garlic vinaigrette. Over the years that bowl became infused with the scent of olive oil and garlic and the wood, so well oiled, turned from medium brown to a rich, deep brown.
You'll note in the slide show below, that I coarsely chopped a clove of garlic on a wooden cutting board first. I then added a pinch of salt and chopped the garlic some more, sliding the flat side of the knife back and forth across the garlic to create a paste, and then chopping some more.
Using the knife, I then scooped the garlic paste into my wooden salad bowl.
Garlic Dressed Salad Greens
1) Wash and drain (or run through a salad spinner) a selection of your favorite salad greens. In the pic at top, you'll see that I chose tender young spinach, red lettuce, red beet leaves, iceberg lettuce, and sweet snap-pea greens.
2) On a chopping board, chop a clove of garlic coarsely, as I describe above. Place the garlic paste in a wooden bowl and pour in 2-3 tablespoons of a good quality virgin olive oil, and a tablespoon of good quality balsamic vinegar.
3) With the back of a wooden spoon, work the garlic into the oil and vinegar.
4) Taste test. Given that a pinch or two of salt went over garlic to create the paste, additional salt is probably not necessary, but you might find it needs some ground black pepper, or a splash of lemon juice. You could add a drop of honey or a pinch of sugar which will tone down the tartness of the lemon and or vinegar.
5) Toss in your selection of greens and gently toss with wooden salad utensils.
6) Once tossed, I added some lavender-colored chive flowers and the white flowers from the sugar snap-pea greens.
Edible flowers are such pretty garnishes in a green salad plus they add flavor.
To Serve: Spoon salad onto white plates; the white showcases the color of the salad so beautifully. Make sure some of the edible flowers are visible on top since this adds interest and eye-appeal.
Monday, June 14, 2010
Meatless Monday

My favorite flatbread at the moment is Ezekiel's sprouted grain tortillas. And this Meatless Monday I used them to create a sensational, vegetarian meal-in-a-sandwich.
I like the sprouted grain flat-bread because it's moist and chewy and full of chunky bits of sprouted grain, literally! Plus, it's not made from processed flour.
Though not gluten-free, the whole grains (including wheat) in the bread are sprouted prior to being made into dough, and it is this process that makes the gluten in the grains more digestible.
So with sprouted flatbread on hand, and lots of tender kale leaves in the garden, and fresh herbs, i.e. parsley, mint, flowering chives, I decided to combine mostly raw ingredients for this meal, bar, what I consider this sandwich's piece d' resistance: warm, caramelized onions.
Follow the slide show below, and the method recipe below that to make:
Herb Cheese, Kale & Caramelized Onion Flatbread
1) Wash and drain a handful of fresh herbs such as parsley, mint and chives, or parsley, basil and chives or parsley, sage and chives.
2) Place patted-dry herbs into a large cup and chop coarsely with kitchen scissors until.
3) Toss chopped herbs into a bowl; add a heaped spoonful of one of, or a combination of, cream cheese, goat cheese ricotta cheese or any soft, white cheese.
4) Peel and chop and chunk of cucumber and add that to the bowl, plus a quarter of a soft avocado.
5) Using a fork, gently mash the ingredients together, maybe add a squeeze of lemon juice, salt and pepper -- test taste to determine whether you want to add the juice and seasoning.
6) Spread the creamy mix onto one side of a piece of flatbread.
7) Now peel and slice an onion, adding it to a pan with a chunk of butter and about a teaspoon of brown sugar.
8) Stir over low heat so that the butter and sugar coat the sliced onion. Put the lid on the pan, and allow the onion to soften -- about 5-7 mins. At the last minute add about a teaspoon of balsamic vinegar; stir it in well. The vinegar will offset the sweetness of the onion while also adding a golden color.
9) Tear several kale leaves into pieces, and place into a bowl. Pour about a tablespoon of your choice of oil over the kale (I used walnut oil)-- just enough to coat the leaves. Add a pinch of salt, and now work the oil and the salt into the kale with your fingers so that the leaves soften. Add a dash of vinegar or lemon juice.
To Serve: Layer the kale over the creamy filling on the flatbread, and then top with lots of caramelized onion. Place a second piece of flatbread on top and then using a sharp knife slice the sandwich in four, placing the triangles decoratively on a serving plate.
You'll note in the pic at top that I added a couple pieces of sliced tomato for color, though you could add sliced bell peppers, chunks of raw carrot or any number of colorful vegetables. For a decorative garnish, and for fun and interest, I used the flowering chive buds, plus some stem.
Subscribe to:
Posts (Atom)


